![]() Multi-factor authentication is a process where you are prompted when you sign-in to Office Office 365 for an additional form of identification, such as to enter a code from your phone.
Multi-factor authentication is a process where you are prompted when you sign-in to Office Office 365 for an additional form of identification, such as to enter a code from your phone.
INTRODUCTION
As we move to MFA, certain security measures need to be implemented, so you will need to re-enter your password on your Native Mail App so that we can proceeed with the setup of MFA.
INSTRUCTIONS
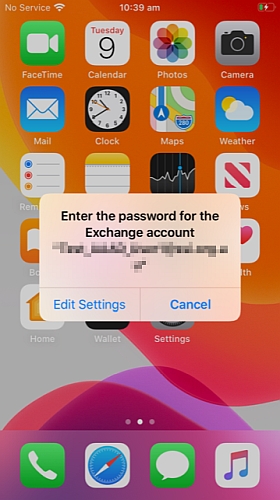
Step 1. On your iPhone, your screen may prompt you to Enter your password for the Exchange account. Click on Edit Settings
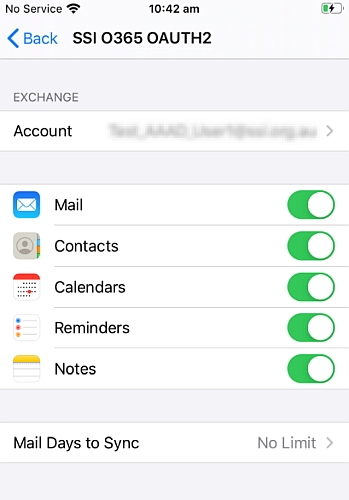
Step 2. Edit Settings should now take you to the Passwords & Accounts Settings of your iPhone. Select the Account SSI O365 OAUTH2 and then select the Re-enter Password


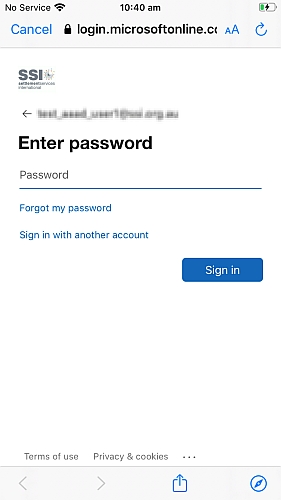
Step 3. Your screen should now show the following screenshot below. Enter your Password.
Step 4. Once you’ve signed in, your iPhone should now take you back to the below screenshot. You should no longer see the Re-enter Password field at the top of your screen and your mail should now be in synchronisation with your Mail app. Open your Mail app to check that your emails are now populating.
INTRODUCTION
Before we go through the process of setting up Multi-Factor Authentication, please ensure you have your iPhone and PC/laptop in front of you so that you can proceed with the following steps.
NOTE: If you don't see the Microsoft Authenticator application on your home screen, navigate to Self Service and install from there.
INSTRUCTIONS
Step 1. On your iPhone, please find the Microsoft Authenticator application on your home screen
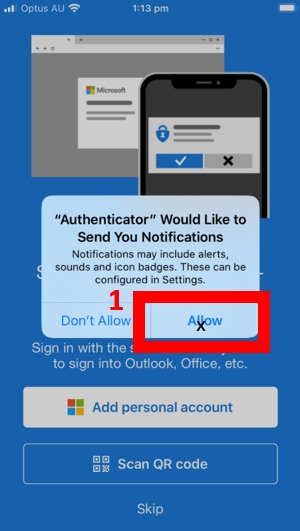
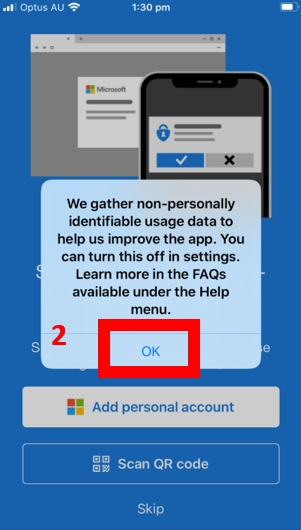
Step 2. Click on the application to open and follow the red boxes in the below screenshots to prepare Microsoft Authenticator application.
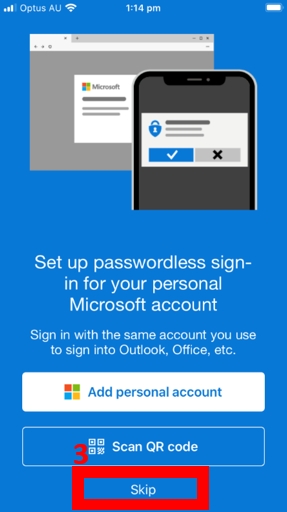
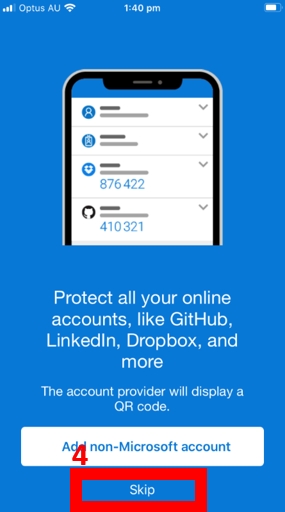
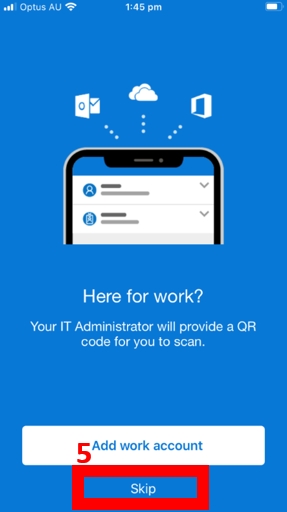
After accepting all previous settings, you should see the following screen
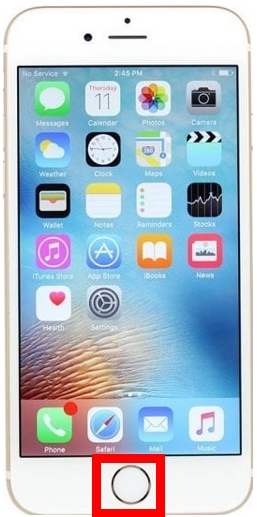
Step 3. Press the circle (home) button on your iPhone to take you back to your home screen.
Step 1. On your PC/laptop, open your browser (Google Chrome or Microsoft Edge) and type in https://aka.ms/MFASetup
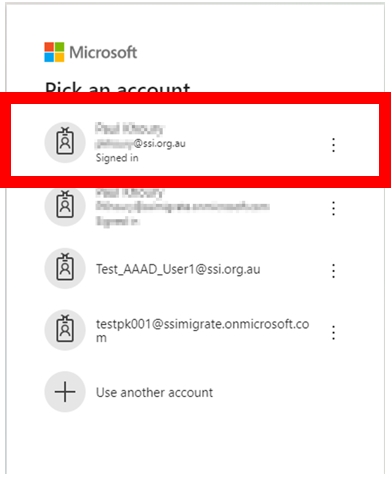
Once presented with the below screenshot, pick your account to sign in with.
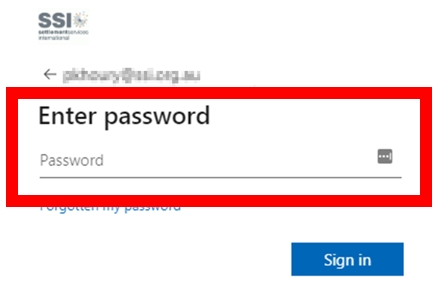
Step 2. Enter your password and click Sign in
Step 3. Select Set up
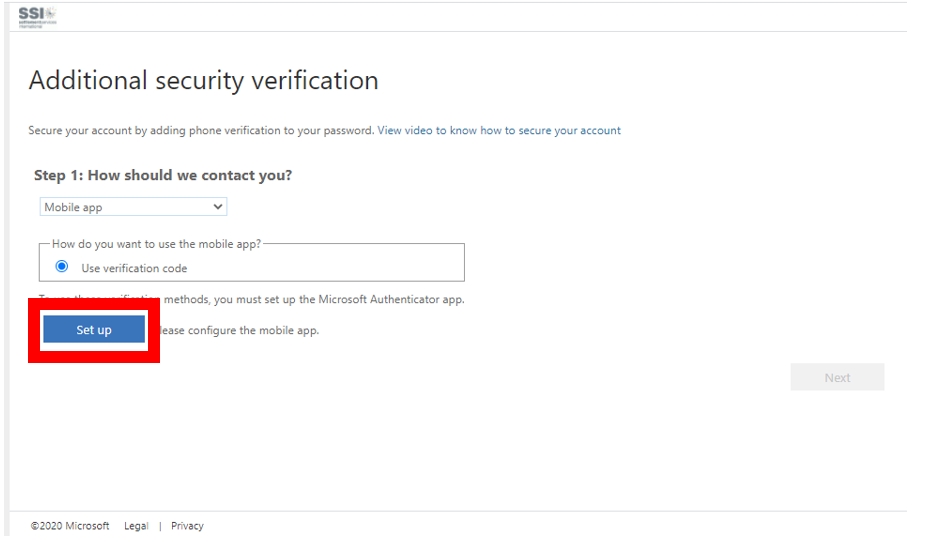
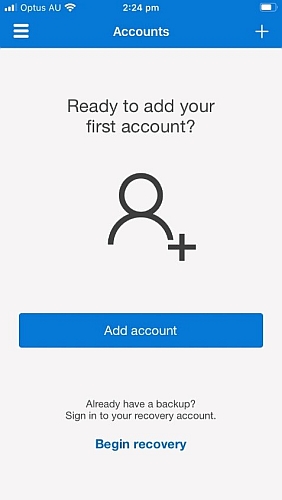
You should now be presented with the following screen
Step 4. Open the Microsoft Authenticator application on your iPhone.

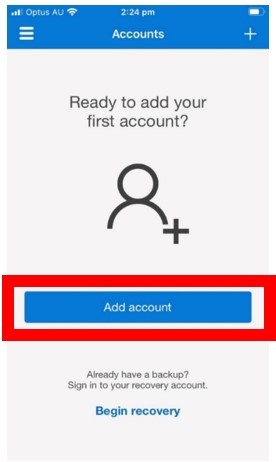
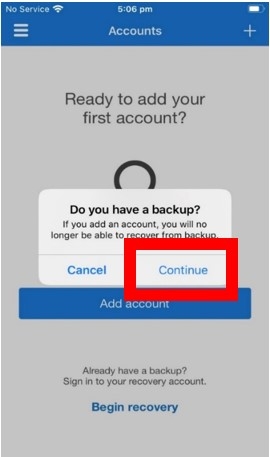
Step 5. Click on Add Account. It will then ask if you have a backup, press Continue.
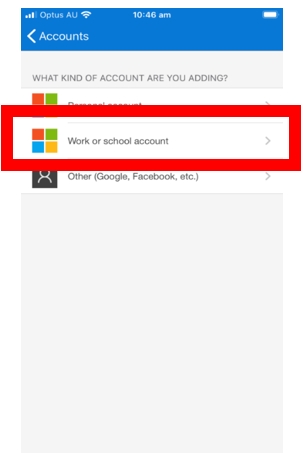
Step 6. On the next screen, select Work or School Account
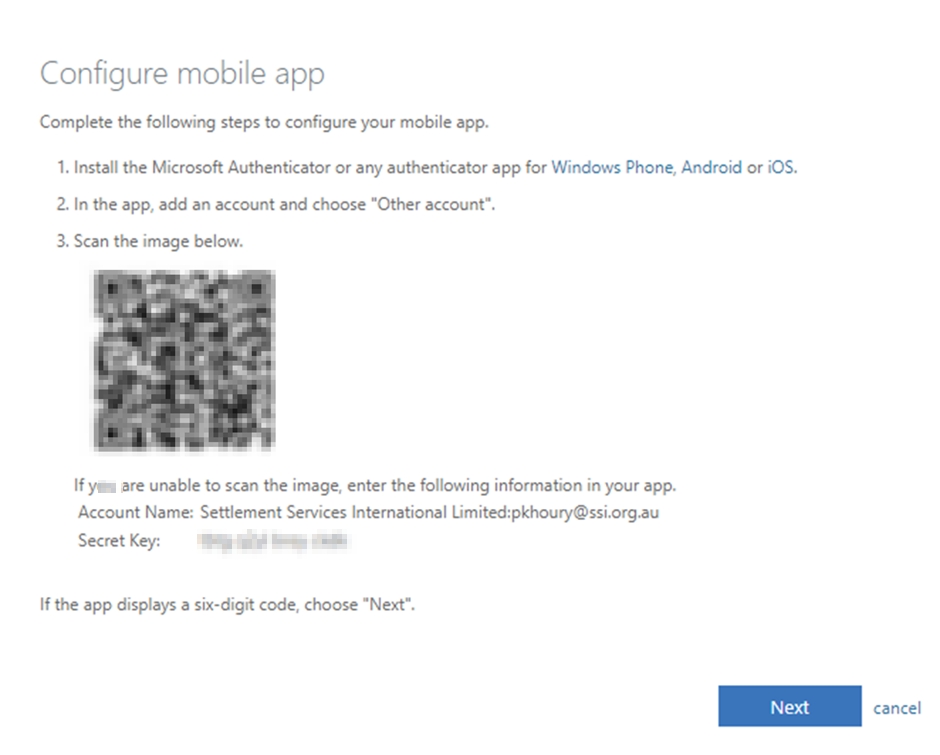
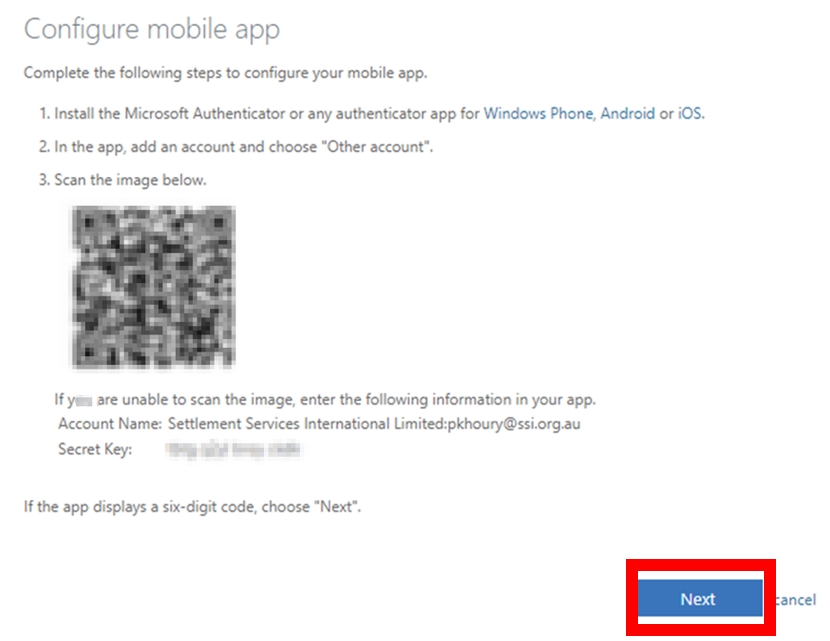
Step 7. You will then be presented with the below screen to scan the QR Code on your Desktop screen.
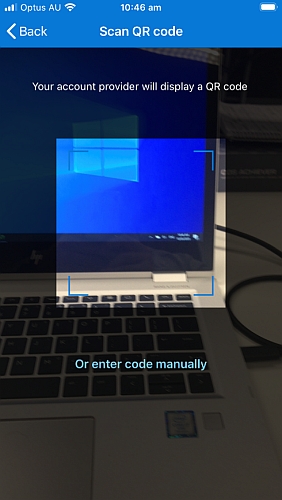
Step 8. Hover over the QR Code on your Desktop screen to scan the QR Code.
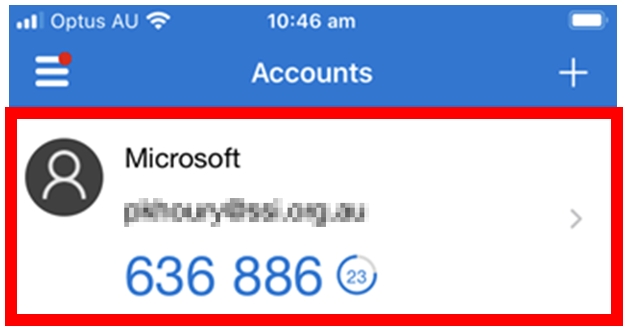
Your iPhone screen should go back to the Account screen and you should now have an account listed with the title Settlement Services International or Microsoft.
Step 9. Go back to your Internet Browser now and select Next on the page
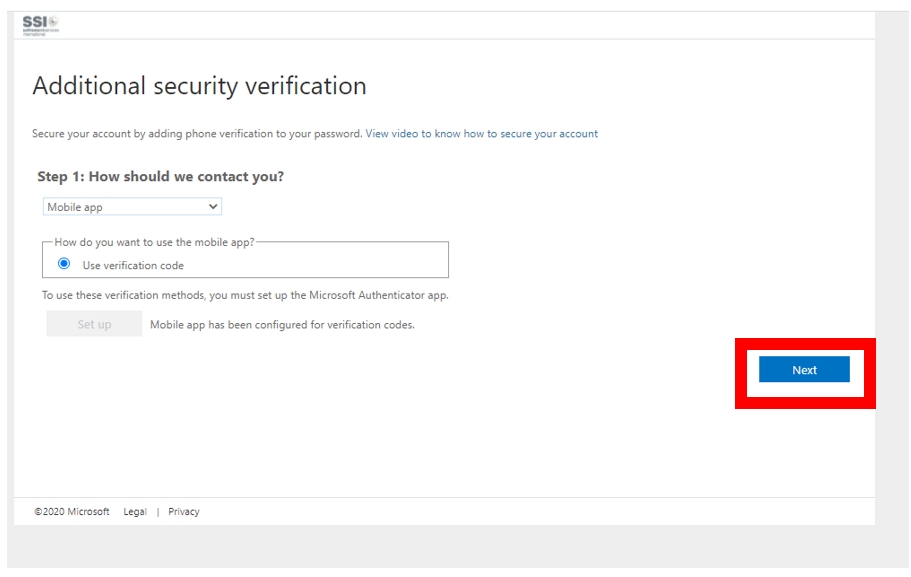
Step 10. You should only have one option Use Verification Code. Select Next on screen.
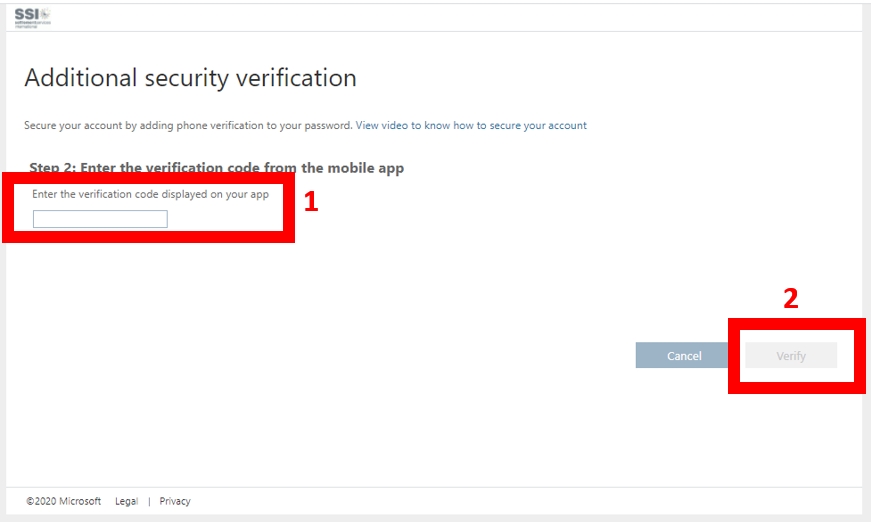
Step 11. A code should generate on the iPhone Microsoft Authenticator application. Place the number in the box that says Enter the verification code displayed on your app. Press Verify.
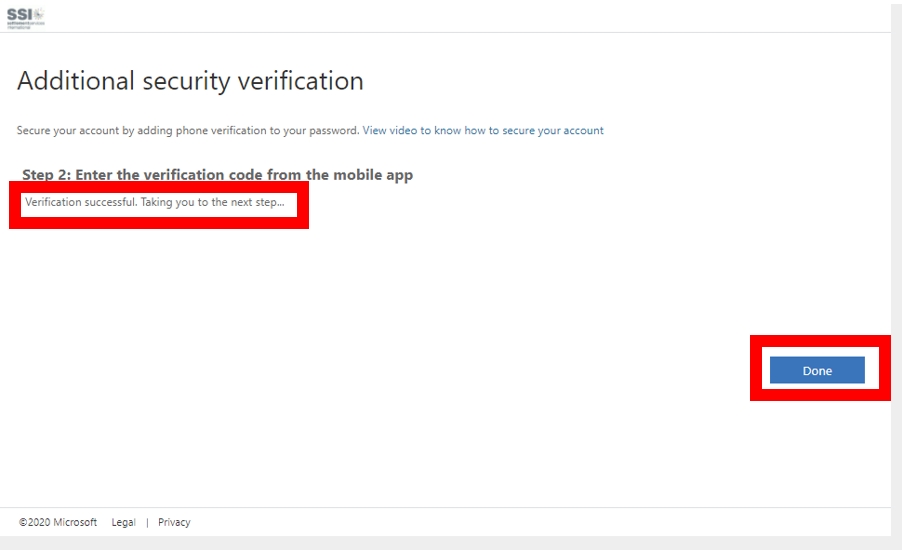
Step 12. Your screen will return to the below screenshot. If you see the message Verification successful. Taking you to the next step.., then you have successfully setup your MFA. Select Done.